The server name or IP in MetaTrader 4 (MT4) is crucial in establishing a secure and efficient connection between the trading platform and the broker’s infrastructure. It functions as an address, guiding the platform to the correct server where trading data resides.
Without the appropriate server details, traders could not access live price feeds, historical data, or execute trades. The server ensures that traders are interfacing with the correct broker, providing a seamless trading environment. Incorrect server details can hinder a trader’s ability to interact with the market or lead them to a different trading environment.

How to Add Server in MetaTrader 4?
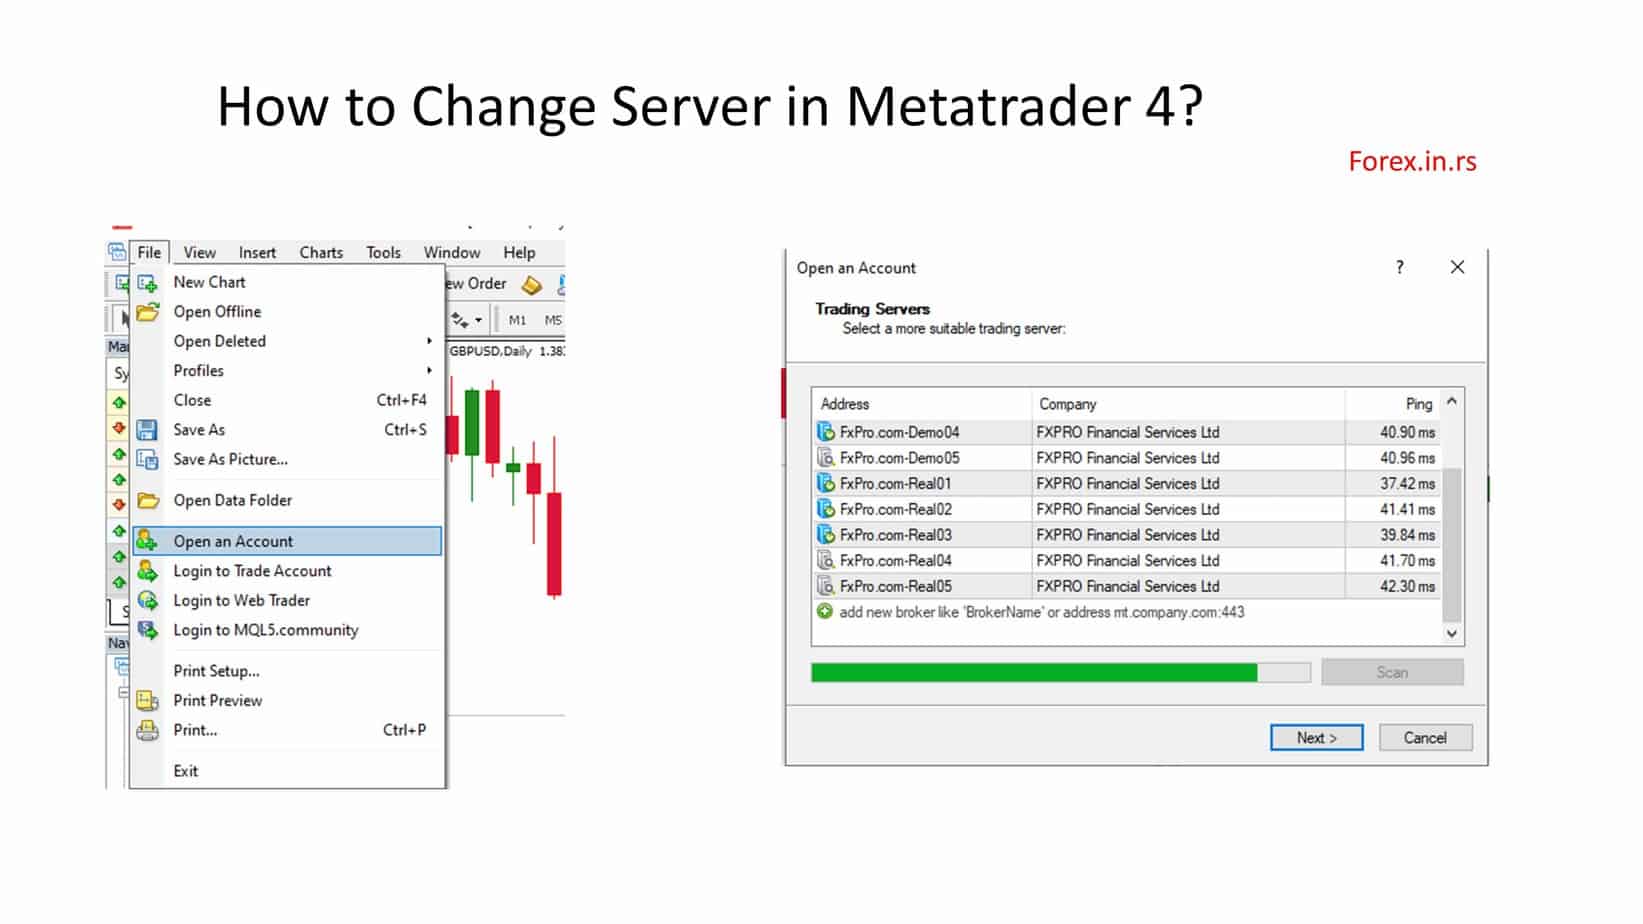
To add a server to the MT4 platform, do the following steps:
- Open MT4
- Launch the MetaTrader 4 platform on your device.
- Navigate to File
- Locate and click on the “File” option, which is found in the top-left corner of the menu bar.
- Open an Account
- In the dropdown menu that appears after clicking “File,” choose and click on the “Open an Account” option.
- Scan Servers
- Once the new window opens, click the “Scan” button to search for available servers.
- Add MT4 Server URL
- If you already have the direct MT4 server URL, manually input it into the provided field.
- Choose a Broker Server (Alternative method).
- If you do not have the direct server URL, you can scroll through and select your broker’s server from the provided list.
- Select Server
- Find and select the desired server you want to connect to from the displayed list.
- Proceed
- Click on the “Next” button to finalize the server addition process and move on to the subsequent steps (if any).
Remember, after adding a server, you will often need to provide login credentials to access your trading account or opt to create a new demo account.
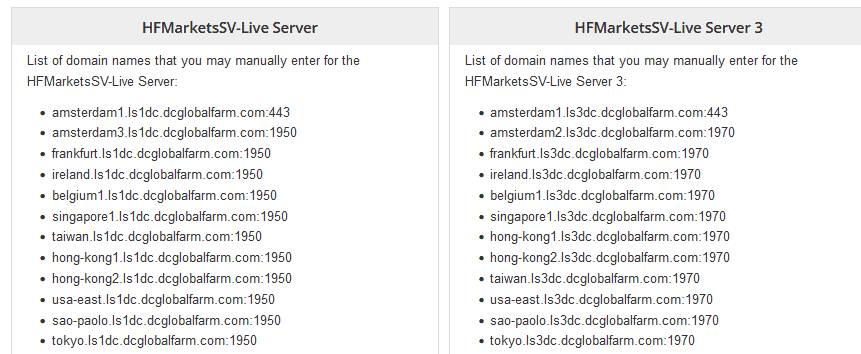
Some brokers will help you get IP or server names when you contact them. However, some of them, like HFM forex broker, offer a list of servers on their page:

How do you add multiple brokers in MT4?
In MetaTrader 4 (MT4), you cannot directly manage multiple brokers from a single platform instance. Instead, if you want to access multiple brokers, you need to install multiple instances of MT4, each associated with a different broker. Here’s how you can set up multiple brokers in MT4:
- Download MT4 Installer from Each Broker:
- Go to the website of each broker you want to use.
- Download their specific version of the MT4 platform.
- Install Multiple Instances:
- Run the first broker’s MT4 installer.
- When prompted to select the installation directory, choose a unique folder name (e.g.,
MT4 BrokerName1). - Complete the installation.
- Repeat this process for each broker, ensuring each MT4 installation has a unique directory.
- Launch Each MT4 Instance:
- Navigate to each installation directory or use the desktop shortcuts (if created during installation).
- Run the
terminal.exefile for each broker’s MT4.
- Log into Each Broker Account:
- For each MT4 instance, click on
Filethe menu. - Choose
Login to Trade Account. - Enter the account details provided by the respective broker.
- Click on the
Loginbutton.
- For each MT4 instance, click on
- Managing Multiple Brokers:
- You can run multiple MT4 instances simultaneously. Each instance will represent a different broker.
- Toggle between instances to manage and monitor accounts across different brokers.
- Shortcut Customization (Optional):
- To easily differentiate between multiple MT4 brokers, rename each desktop shortcut to the respective broker’s name.
- You can also change the icon for easy identification (requires third-party software or using Windows’ native functions).


